Showing posts with label Desserts. Show all posts

Wednesday, March 28, 2012

Cheesecake Cookie Cups

On my list to make again, so I decided to pull out this yummy recipe to share with everyone again...

The other day after taking my pantry inventory, I found that I had several boxes of cream cheese and a can of sweetened condensed milk that were getting close to their use by dates. I also had some ready to bake cookie dough in my fridge that I needed to use but I didn't just want to make plain ol' cookies.

So I went digging around on some of my favorite baking sites and blogs and I ran across this recipe on Nestle's Very Best Baking website and decided that they would make a excellent treat for the family so I made them today along with a few alterations.


Cheesecake Cookie Cups


1 pkg. (16.5 oz.) Ready to bake chocolate chip cookie dough
2 pkgs. (8 oz. each) cream cheese, room temperature
1 can (14 oz.)sweetened condensed Milk, not evaporated
2 large eggs
2 teaspoons vanilla extract
1 can (21 oz.) cherry pie filling(optional)
or 1/2 bag chocolate chips, melted with 2 tbsp Crisco


Paper-line 24 muffin cups. Place one piece of cookie dough in each muffin cup.

BAKE at 325° for 12 to 15 minutes or until cookie has spread to edge of cup.


BEAT cream cheese, sweetened condensed milk, eggs and vanilla extract in medium bowl until smooth. Pour about 3 tablespoons cream cheese mixture over each cookie in cup.

BAKE for additional 18 to 30 minutes or until set. Cool completely in pan on wire rack.


Top each with level tablespoon of pie filling or drizzle melted chocolate chips.

Refrigerate for 1 hour.


Baking Notes: I didn't have any pie filling but I had a 1/2 bag of special dark chocolate chips in my fridge. I poured the chips into a microwaveable bowl and added 2 tbsp Crisco and put the bowl in the microwave for 3 minutes or until the chips are totally melted. Once the chips are melted, I transferred them to a plastic bag and clipped the corner of the bag and drizzled the chocolate on top of the cheesecake cookie cups while they were cooling on the counter.

I am sure that you could make up a batch of chocolate chip cookie dough rather than using the ready to bake to dough and just put a 2-3 tbsp. dough in each muffin cup.

This recipe was easy to prepare although I did have to bake them longer than stated in the original recipe.  They will make an easy go to dessert for hubby to take to work or for those planned summertime potlucks!

Enjoy!

This post is linked to:


Tuesday, December 13, 2011

Holiday Goodie Plates


I love to bake!  I love to share my creations with others! What better time to share baked goods with friends and neighbors than at the holiday season. I am going to share with you how to make up holiday sample plates for gift giving to your friends and neighbors for the holidays.

After the Thanksgiving bustle is finished, I take the time to write down a list of goodies (around a dozen) and some are family favorites while a few others are new things to try.  I always look through my pantry stockpile to see what baked goods on the list I can do without having to purchase items to complete the goodies.  Once I have completed my list I look over it to see what goodies (like fudge, & bread) will freeze without problems and I mark those as the first to complete.  When I make my list I try to make things that share the same ingredients but are different, like my peanut butter & chocolate day, so that I do not have to get LOTS of different ingredients that I might not use again.

Now that we have the list of goodies figured out, it is time to get baking!  I try to make something every day during the first three weeks of December so that I do not feel overwhelmed, however, that doesn’t always happen!  Some years I have done one or two big baking days and called it good!  

Photobucket One tip about baking cookies for the sample plates: if you have a small scoop or small cookie cutters or a cookie press use those instead of your larger scoops or cutters!  Using the smaller items means that you will get more cookies out of your dough and it will take less baking time, hence making things move a little faster and truly making the plates where you are able to get a sampling of everything that you have baked rather than just a few items.

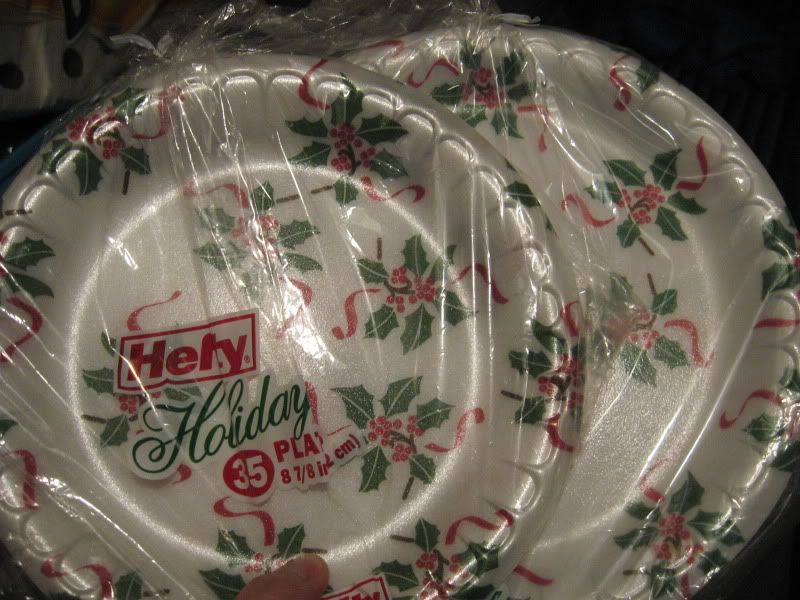
The baking is done and it is a couple days before Christmas, now is the time to put your plates together! I purchased a couple of packages of Christmas styrofoam plates to use.  I got two different sizes, so that my neighbors who are widowed or just a couple get the smaller ones while the families with kids get the bigger plates.   I set out the plates and the goodies on my dining room table and the kids and I work at putting goodies on the plate.  There is a catch to putting the goodies on the plate…we put enough of each goodie for each person in the family. So if the plate is going to go to the family of five next door then we put only five snickerdoodles or five pieces of fudge and continue to fill the plate with five of the different goodies until the plate is full.  If the plate is going to the widow across the street then I will only fill the plate with one or two pieces of each of the goodies.  I also give a mini loaf of bread (yeast or quick) with the sample plate, I have those wrapped in foil and have labeled them as to what they are and give them right out of the freezer so that if the recipient wants they can place the bread back in the freezer to use at a different time.

Once the plate is full, I put a piece of saran wrap over each plate and fill out a gift tag and get a bow to stick on the top of the plate.  The plates are now ready to deliver. I put the plates together so it is hubby turn to do his part of the giving!  He and a couple of the older kids deliver the goodies to the neighbors either on December 23rd or Christmas Eve before the different families leave for Christmas celebrations.

So even though the sample goodie plates take time and effort they are something that the whole family can help in preparing and the neighbors will appreciate the thoughtfulness.  

Merry Christmas to you and your family!

This post is linked to:


Tuesday, March 29, 2011

"Monster" Cookies

My kids love it when I make my basic chocolate chip cookie recipe but instead of just using chocolate chips add other "flavors" of chips like white chocolate and M&M's. When I do these kind of cookies they call them "Monster Cookies" because of all the goodies in them and the fact that I use my large Pampered Chef scoop rather than the small scoop.


Monster Cookies

Ingredients:
3 cups all-purpose white flour
1 1/2 cups whole wheat flour
2 teaspoon baking soda
2 teaspoon salt
2 cups (4 sticks) butter or margarine, softened
1 1/2 cups granulated sugar
1 1/2 cups packed brown sugar
2 teaspoon vanilla extract
4 large eggs
1 cup chocolate chips
1 cup white chocolate chips
2 cups M&Ms
2 cups chopped walnuts (optional)

Directions:

Heat oven to 375° F.

COMBINE flour, baking soda and salt in small bowl. Beat butter, granulated sugar, brown sugar and vanilla extract in large mixer bowl until creamy. Add eggs, one at a time, beating well after each addition. Gradually beat in flour mixture. Stir in chocolate chips, white chocolate, and M&Ms. Stir in nuts, if desired. Drop by rounded tablespoon onto ungreased baking sheets(I use my large Pampered Chef scoop!).

BAKE for 9 to 11 minutes or until golden brown. Cool on baking sheets for 2 minutes; remove to wire racks to cool completely.

PAN COOKIE VARIATION: Grease two 15 x 10-inch jelly-roll pan. Prepare dough as above. Spread into prepared pan. Bake for 20 to 25 minutes or until golden brown. Cool in pan on wire rack.

Makes about 6 dozen cookies.

Notes: I have been known to split the dough in half and do half as a pan cookie/brownie and the other half as individual cookies.  When cooking the larger cookies it will take up to the 11 minutes to get the cookies to the golden brown state.

This post is linked to:

Tuesday, March 23, 2010

Cheesecake Cookie Cups

The other day after taking my pantry inventory, I found that I had several boxes of cream cheese and a can of sweetened condensed milk that were getting close to their use by dates. I also had some ready to bake cookie dough in my fridge that I needed to use but I didn't just want to make plain ol' cookies.

So I went digging around on some of my favorite baking sites and blogs and I ran across this recipe on Nestle's Very Best Baking website and decided that they would make a excellent treat for the family so I made them today along with a few alterations.


Cheesecake Cookie Cups


1 pkg. (16.5 oz.) Ready to bake chocolate chip cookie dough
2 pkgs. (8 oz. each) cream cheese, room temperature
1 can (14 oz.)sweetened condensed Milk, not evaporated
2 large eggs
2 teaspoons vanilla extract
1 can (21 oz.) cherry pie filling(optional)
or 1/2 bag chocolate chips, melted with 2 tbsp Crisco


Paper-line 24 muffin cups. Place one piece of cookie dough in each muffin cup.

BAKE at 325° for 12 to 15 minutes or until cookie has spread to edge of cup.


BEAT cream cheese, sweetened condensed milk, eggs and vanilla extract in medium bowl until smooth. Pour about 3 tablespoons cream cheese mixture over each cookie in cup.

BAKE for additional 18 to 30 minutes or until set. Cool completely in pan on wire rack.


Top each with level tablespoon of pie filling or drizzle melted chocolate chips.

Refrigerate for 1 hour.


Baking Notes: I didn't have any pie filling but I had a 1/2 bag of special dark chocolate chips in my fridge. I poured the chips into a microwaveable bowl and added 2 tbsp Crisco and put the bowl in the microwave for 3 minutes or until the chips are totally melted. Once the chips are melted, I transferred them to a plastic bag and clipped the corner of the bag and drizzled the chocolate on top of the cheesecake cookie cups while they were cooling on the counter.

I am sure that you could make up a batch of chocolate chip cookie dough rather than using the ready to bake to dough and just put a 2-3 tbsp. dough in each muffin cup.

This recipe was easy to prepare although I did have to bake them longer than stated in the original recipe.  They will make an easy go to dessert for hubby to take to work or for those planned summertime potlucks!

Enjoy!

This post is linked to:


Tuesday, February 23, 2010

Triple Chocolate Brownie Cookies

As I was looking through my new Taste of Home 2010 Annual Recipe cookbook, I came across this chocolate lover's delight!  They are easy to make despite having to chill the dough and definitely fill that chocolate sweet tooth! They taste like brownies!


  • Triple Chocolate Brownie Cookies

  • 4 ounces unsweetened chocolate, chopped
  • 3/4 cup butter, cubed
  • 4 eggs
  • 2 cups sugar
  • 1-1/2 cups all-purpose flour
  • 1/2 cup baking cocoa
  • 2 teaspoons baking powder
  • 1/2 teaspoon salt
  • 2 cups (12 ounces) semisweet chocolate chips, divided
  • 2 teaspoons shortening

  • In a microwave melt chocolate and butter; stir until smooth. Cool slightly. In a large bowl, beat eggs and sugar. Stir in chocolate mixture. Combine the flour, cocoa, baking powder and salt; gradually add to chocolate mixture and mix well. Stir in 1-1/2 cups chocolate chips. Cover and refrigerate for 2 hours or until easy to handle.

  • Drop by tablespoonfuls 2 in. apart onto greased baking sheets. Bake at 350° for 7-9 minutes or until edges are set and tops are slightly cracked. Cool for 2 minutes before removing from pans to wire racks to cool completely.

  • In a microwave, melt remaining chips and shortening; stir until smooth. Drizzle over cookies. Let stand for 30 minutes or until chocolate is set. Store in an airtight container. Yield: 6 dozen.

This post is linked to:

Friday, February 12, 2010

Easy Brownie Torte

Brownies are one of my hubby's favorite desserts so I had decided to make up some for the Valentine's Day weekend for our enjoyment.  When I pulled out a box from my pantry and to my delight found this recipe on the back of the box!! What a great idea to make for a special occasion like Valentine's day!  It is so simple to make but it looks so elegant.  The best part is that I have all the ingredients in my pantry!  However, I am going to change the Reese's peanut butter cups with either chopped Snicker bars(hubby's favorite candy) or Heath bits.  If I use Heath bits I am going to put some of the bits between the layers of brownie too.

Easy Brownie Torte

1 box brownie mix
3 Tbsp. water
1/2 cup vegetable oil
2 eggs
1 container chocolate frosting
1/2 cup Reese's peanut butter cups, coarsely chopped 


Heat oven to 350°F. Line 13x9-inch pan with foil so foil extends about 2 inches over sides of pan. Spray foil with cooking spray. Make brownies as directed on box for 13x9-inch pan, using foil-lined pan. Cool completely, about 1 hour 30 minutes.


Remove brownie from pan by lifting foil; peel foil away. Cut brownie in half lengthwise; place 1 half on serving plate.(or a 10x5 piece of double thickness cardboard covered in foil, cellophane, or coated giftwrapping paper)


Spoon frosting into microwavable bowl. Microwave on High 15 to 20 seconds. Stir frosting until smooth. Pour half of frosting over brownie half on plate. Place other half of brownie on top; pour remaining frosting over top. Sprinkle with candies. Refrigerate 30 minutes to set. Store loosely covered.

This posted is linked to:


Tuesday, January 12, 2010

Peanut Butter Cupcakes

The "Eat from your Pantry Challenge" is going on fully steam around the blogosphere. Even though I am not participating this time around,  I thought it would be great to share one of my recipes that I make that uses up a few things that I keep in my pantry and often wonder what I can make with them that would be kid friendly. Are you like me and have boxed cake mixes and canned frosting in your pantry and wondering what you could make with it other than just making up plain old cake or cupcakes?

Why not try these easy to put together, yummy, kid friendly cupcakes??!!

Peanut Butter Cupcakes


Cake:
1 box yellow cake mix

1 1/4 cups water

1/4 cup vegetable oil

3 eggs

3/4 cup creamy peanut butter

Frosting:
1 container chocolate frosting

1/4 cup creamy peanut butter

1/3 cup chopped peanuts(optional)


Directions:
1. Heat oven to 350°F (325°F for dark or nonstick pans). Place paper baking cup in each of 24 regular-size muffin cups.

2. In large bowl, beat cake mix, water, oil, eggs and 3/4 cup peanut butter with electric mixer on low speed 30 seconds. Beat on medium speed 2 minutes, scraping bowl occasionally. Divide batter evenly among muffin cups (about 2/3 full).

3. Bake 20 to 25 minutes or until toothpick inserted in center comes out clean. Remove from pan to cooling rack. Cool completely, about 30 minutes.

4. In medium bowl, stir together frosting and 1/4 cup peanut butter. Frost cupcakes with frosting mixture. Sprinkle with peanuts, if desired; press lightly into frosting.

Notes: Since I am not big fan of chopped peanuts I used about 1/2 tsp. grape jelly on top of several cupcakes while leaving others plain.

This post is linked to:

Friday, January 8, 2010

Pumpkin Sheet Cake

Its the Monday before Christmas and I am scurrying around like a squirrel gathering nuts for winter trying to get a Christmas day dinner planned for a crowd of people!!  When the planning first started, there was a good possibility that I would need to have food for 24 people!  So when it came to thinking and planning the desserts that I wanted to serve I decided that I would find desserts that I didn't have to make two or three batches in order to serve the crowd the dessert.  So when I came across Tammy's pumpkin sheet cake, I knew this would do the trick and then some!!  However, I can not seem to do a recipe without changing a few things!


Tammy's Pumpkin Sheet Cake(with my modifications)

Cake Ingredients:
16 ounces (2 cups) canned solid-pack pumpkin
2 cups sugar
1/2 cup vegetable oil
1/2 cup applesauce
4 eggs, lightly beaten
1 cup all purpose flour
1 cup whole wheat flour
2 teaspoons baking soda
2 teaspoons pumpkin pie spice
1/2 teaspoon salt

Cream Cheese Frosting Ingredients:
4 ounces cream cheese, softened
5 tablespoons melted butter or margarine
1 1/2 teaspoons vanilla
1 3/4 cups powdered confectioner's sugar
2-4 teaspoons milk
chopped nuts, for topping

Instructions:
1. Beat pumpkin, sugar, and oil. Add eggs, mixing well.

2. In another bowl, combine dry cake ingredients and stir to mix. Add to pumpkin mixture and beat well.

3. Pour batter into greased 15 x 10 x 1-inch jelly roll pan. Bake at 350 degrees for 25-30 minutes or until cake tests done with a toothpick. Cool on a wire rack (in the pan); cover with a towel after about 15 minutes of cooling.

4. To make frosting, beat cream cheese, butter, and vanilla in a mixing bowl until smooth. Gradually add sugar, mixing well. Add milk until frosting reaches desired thickness. Frosten cooled cake and sprinkle with chopped nuts if desired.


Notes:
I am not sure what the purpose of covering the cake with a towel after 15 minutes of cooling so I didn't do it and I still had a moist cake. I found that when making the frosting, I only needed 3 teaspoons of milk for the right consistency for frosting the cake.  Also, the frosting will thin out if the cake isn't completely cool!  This cake definitely serves a crowd!  I was able to even freeze a few pieces and they froze and thawed wonderfully!

The remarks of those that ate the pumpkin sheet cake:

  • "Can I have the recipe? This cake is so moist and the cream cheese frosting isn't too strong and tastes just right with the cake."
  • "Where did you find the recipe for this cake?"  I would like to have the recipe so that I can make it too!"
  • "This is soo good and moist! Can I take some home with me to have later!"

The other dessert I did with my Christmas dinner was Chocolate Mousse Torte, which was also another new recipe!  You can read a review here!


This post is linked to: 

Tuesday, January 5, 2010

Chocolate Mousse Torte

Shortly before Christmas, I was alerted by Meijer that they are getting ready to partner with Katie Brown in the spring with a new product line in stores. If you don't know Katie Brown, she is a “lifestyle maven”, current PBS host and Oxygen network alumnus. She has also authored several books focusing on lifestyle and entertaining, and is a syndicated lifestyle columnist as well. She has a motto that I just love and already work to instill in my house and that is "keeping things simple!"
Anyway, Meijer sent me a Katie Brown kit containing one of her recipes, a 10" Anchor Hocking serving cake plate, the non-perishables, a nice big canvas bag and a $10 Meijer gift card to get the rest of the ingredients to do up one of Katie Brown's recipes and I must say that it could not have come at a better time!  I was really struggling to figure out a dessert to have after Christmas dinner that was something simple but yet elegant.  I really didn't want to fix what I call an everyday dessert like chocolate cake or chocolate chip cookies. I wanted something more but didn't take me all day to put together.

The Chocolate Mousse Torte of Katie's in the kit was the answer!! It was easy to assemble, and even though I missed putting the melted chocolate into pudding mixture it didn't ruin the taste or presentation of the dessert.   I liked the fact that several of the needed ingredients are items that I keep in my pantry so I could have made up the dessert without making a special trip to the store.


Chocolate Mousse Torte

37 Nilla Wafers, divided
4 Squares Baker's Semi-Sweet Chocolate, divided
2 Pkg. Jell-O Chocolate Instant Pudding
2 Cups + 2 tbsp. Cold Milk, divided
1 Tub(8oz) Cool Whip Whipping Topping, thawed, divided
1 pkg (8oz) cream cheese, softened
1/4 Cup Sugar
3/4 Cup(6 oz pkg) Raspberries, fresh

1. Stand 16 wafers around inside edge of a 9-inch round pan lined with plastic wrap. Melt 3 chocolate squares as directed on package.

2. Beat pudding mixes and 2 cups milk in medium blow with whisk, 2 minutes. Add melted chocolate; mix well. Stir in 1 cup Cool Whip; pour into prepared pan.

3. Beat cream cheese, sugar, and remaining milk with mixer until well blended. Stir in 1 cup of remaining Cool Whip; spread over pudding. Top with remaining wafers.

4. Refrigerate 3 hours.

5. Invert torte onto plate. Remove pan and plastic wrap. Shave remaining Chocolate Square into curls. Top torte with remaining Cool Whip, berries, and chocolate curls.

Notes: I used a pie pan since I didn't have a springform pan or round pan with straight sides. I think it would be better because I had a hard time keeping the wafers on the side of the pan. However, putting some of the pudding mixture in the bottom of the pan and spreading it to the edges helped to "stand up" the wafers on the side of the pan. I forgot the melted chocolate squares in the pudding mixture, I think it would have been more "airy"/mousse texture and less sloppy and pudding like in consistency.  However, the end result of the torte still tasted yummy.  Instead of refrigerating the dessert for 3 hours, I stuck in the freezer for 1 1/2 hours before inverting the torte on the serving plate. Once inverted on the serving plate, I placed the torte in the fridge until serving time. Most of my family doesn't like raspberries so I probably will omit them the next time I make this torte (esp. if they are $3.49 for 6oz) and just use the chocolate curls for the garnish.

Review: I give this torte a 10 out of 10. It was a simple dessert although it takes a bit of planning ahead to allow for "chilling" of the torte. I had all but 2 ingredients(raspberries, and chocolate squares) in my pantry at the time of making up the dessert. I definitely will be making this torte again for my family.

The other dessert I served with my Christmas dinner this year(that is shown on the picture above) was Tammy's Pumpkin Sheet Cake!(watch for another post on the cake!)


This post is linked to: 

Friday, November 13, 2009

Muddy Buddies aka "Puppy Chow"

Somehow both the box of Chocolate Chex and Rice Chex were open at the same time!  There is only a few people in my house that like Chex cereal in a bowl of milk.  So instead of throwing it out to the birds or just dumping it in the trash, I figured that I would use it up before it went stale and make a sweet treat with the cereal.

I love making Muddy Buddies because it is quick and easy and you can fill your sweet tooth with chocolate!


I poured the Chocolate Chex and Rice Chex cereal into a big mixing bowl and gathered the rest of my ingredients.


I melted 1 cup milk chocolate chips, 1/4 cup margarine, 1/2 cup creamy peanut butter in a pan. Once melted I removed it from the heat and stirred in 1 tsp. vanilla.  Then I poured the melted mixture on top of my cereal.
Once the cereal was coated with the chocolate/peanut butter mixture, I poured the covered cereal into a ziploc bag that had 1 1/2 cups powdered sugar.


I shook the bag to coat the cereal with the powdered sugar. Once it was fully coated, I added in another 1/2 cup powdered sugar to finish coating it.

Now it is ready to eat!  All total it took me about 10 minutes from start to finish!

With the holidays coming, I am going to be adding this to my list of "go to" appetizers/munchies to have on hand for when guests are visiting!  I love that this recipe is kid friendly as well!  Most of my kids will eat it and most of them know how to fix it without a lot of help from me!

Here is the full recipe:

8-9 cups Chex cereal
1/2 cup peanut butter
1/4 cup margarine
1 cup chocolate chips
1 tsp. vanilla
1 1/2-2 cups powdered sugar

Pour cereal into a big mixing bowl. In a separate bowl or pan, melt peanut butter, margarine, and chocolate chips together. Remove from heat, stir in vanilla. Pour melted mixture on to the cereal, stir carefully until all the cereal is evenly coated.  Put powdered sugar into a gallon ziploc bag(or even a paper grocery bag), pour coated cereal into the bag, close bag and shake until cereal is coated with powdered sugar. Add in more powdered sugar if needed, and shake the bag again. Open bag and enjoy!


This post is linked to:

Tuesday, October 20, 2009

Peanut Butter Filled Fudge Cupcakes

I have been trying to find baked goods to make so that I can stop buying pop-tarts and other high fat/calorie prepared foods that had been purchasing for hubby's snacks at work.  While looking through one of my cookbooks, I came across this awesome recipe for a cupcake that actually has a bit of nutritional value to it.  They are easy to make. I am even planning on letting my kids have them for a breakfast along with some eggs or yogurt!


Peanut Butter Filled Fudge Cupcakes

1 cup all-purpose flour (1/2 cup whole wheat, 1/2 cup white)
1/3 cup unsweetened cocoa powder
3/4 tsp. baking soda
1/2 tsp. salt
1/3 cup shortening (or butter)
1 cup brown sugar, packed
1 tsp. vanilla
2 eggs
1/2 cup milk

Filling:
3 oz. cream cheese, softened
1/4 cup creamy peanut butter (can use crunchy)
1 TBSP. honey
1 TBSP. milk

In a bowl, stir together flour, cocoa powder, baking soda and salt.  In a mixing bowl, beat shortening for about 30 seconds. Add brown sugar and vanilla; beat well. Add eggs, one at a time, beating well after each. Add dry ingredients alternately with 1/2 cup milk, beating well after each addition. In a medium mixing bowl, combine cream cheese, peanut butter, honey, and 1 TBSP. milk; beat well.

Place a scant 2 TBSP of batter in each muffin cup. Spoon about 1 rounded teaspoon cream cheese mixture into center of each; fill cups half full with remaining batter(1 TBSP each muffin cup). Bake in 375° oven for 20 minutes or until done. Cool on wire rack.  Makes 16-18 cupcakes.

Notes: I use my small and medium Pampered chef scoops to measure out the batter and the filling for the muffin cups.  These can be left unfrosted or frosted.  I frosted some of mine with just a can of already made frosting from my pantry stockpile.

This post is linked to: 

Wednesday, October 7, 2009

Pumpkin Cake Squares--Fall Favorite


Pumpkin Cake Squares

Cake:
1 yellow cake mix(save 1 cup for topping)
1/4 cup stick margarine(do not melt)
1 egg

Mix and pat into greased 9x13 pan.

Filling:
1 can(14oz) pumpkin pie mix
2 eggs
2/3 cup evaporated milk

Pour over cake in pan.

Topping:
1 cup cake mix
1/4 tsp. cinnamon
1/4 cup stick margarine(do not melt)
1/4 cup sugar

Sprinkle over cake. Bake 50 minutes @ 350°--done when toothpick comes out clean. Cool!

Top with Cool Whip.

Notes: If using plain pumpkin add 2-3 tsps. pumpkin pie spice. You can make this the day before! To keep longer, place in the fridge for storage.

This recipe gets rave reviews by everyone who has tried it. I have even had people tell me that they like better than just plain ol' pumpkin pie because the pumpkin isn't as strong tasting in this layered cake.

This post is linked to:
** originally posted in August, 2007

Thursday, August 6, 2009

Golden Graham Smores Bars

The summer heat is still upon us so I was looking for something different in the way of a no bake dessert. I have a list of ideas but they all sounded boring the other day when I was looking for some sweetness.

I didn't find anything to fulfill my sweetness craving until I needed to help put a snack together for Vacation Bible School week at my church!

I love it when I can take things out of my pantry and put them together for a yummy snack that even involves chocolate! I also love the fact that my kids are old enough that they can make this snack without too much adult supervision in the kitchen.


Golden Graham Smores Bars

3/4 cup light corn syrup
3 tbsp. butter or margarine
1 pkg(11.5 oz) milk chocolate morsels
3 cups miniature marshmallows
1 tsp. vanilla
1 pkg. Golden Graham cereal (9 cups)

  • Grease 9x13 pan.

  • Heat syrup, butter/margarine, and morsels to boiling, stirring constantly.

  • Remove from heat, stir in vanilla

  • Pour over cereal; toss until coated.

  • Fold in marshmallows, 1 cup at a time.

  • Press in pan with buttered back of spoon. Let stand 1 hour.

  • Cut into 2 inch squares.

  • Store loosely covered at room temperature up to 2 days(if they last that long!).

  • Makes 24 squares.

Overall this takes about 10 minutes to put together. If you get the items on sale like what I did, the cost to make these bars is about three dollars! Not bad!

This post is linked at:

Wednesday, July 1, 2009

No Bake Summertime Dessert Collection

This week I have been blessed with cooler temps so I have been working diligently to fill my freezer with yummy goodies! I know though that the cooler temps are not going to stay...its summer in the Midwest after all!

The dog days of summer will be back and heating up the kitchen is usually not an option! Instead of heating up the kitchen to fill the abundance of the "sweet tooth" at my house, I find no bake desserts work for me! Most of the ones I do are not very labor intensive and the kids love to help me put them together.

Here is a list of the no bake desserts that I rotate through during the hot summer days!


  1. Banana Pops

  2. Lemonade Ice Cream Sandwiches

  3. Peanut Butter Toffee


  4. No Bake Cheesecake


  5. Layered Pudding Cups


  6. Layered Pudding Pie


  7. No Bake Cool Whip Pudding Pie


  8. Haystacks

  9. Peanut Butter Freezer Bars


  10. Fruit Salad

  11. Homemade Chocolate Shakes

I am always looking for other no bake desserts to add to my collection. Do you have a favorite no bake dessert that you like to do??


This post is linked at:

Tuesday, June 23, 2009

Oatmeal Cookie Mix

One thing that I have found to help me with my baking is doing up different goodie mixes to have on hand for those times that I need to fill a sweet tooth or I need something to take to a "pitch in" meal.

One of the mixes I like to do and have on hand because it is so versatile is Oatmeal Cookie Mix from the More With Less Cookbook. If you haven't had a chance to look through this cookbook, I would definitely recommend you do so! There are several good recipes in it!

Oatmeal Cookie Mix

Combine:

1 1/2 cups white sugar
1 1/2 cups brown sugar
3 cups flour
2 tsp. salt
2 tsp. baking soda
1 tsp. baking powder

Cut in:

2 cups shortening

Add:

6 cups rolled oats

Mix well. Store in cool place.

To make cookies:

Combine in bowl:

2 eggs, beaten
2 tsp. vanilla
1 tsp. cinnamon, optional
4 cups oatmeal cookie mix(see recipe above)

Mix well. Drop teaspoonfuls onto greased baking sheet, flatten with fork, if desired, and bake at 350° for about 12 minutes.

Baking Notes: I will change the cinnamon to pumpkin pie spice for a different flavor. I also have added 1-2 cups of craisins, or raisins or chocolate chips to the cookie dough for added variety.

This post is linked at:

Tuesday, June 16, 2009

Two Delicious Summertime Treats

Been working in the kitchen today, stirring up some delight summertime treats!!

First up is fruit salad! I love this time of year when there is many fruits that are in season fresh to choose from to make a tasty colorful fruit salad!


This one is made up of 1 lb strawberries, 1/2 cantaloupe, and 1 can pineapple tidbits in its own juice.

I just cut up the strawberries and cantaloupe and then drained the juice off the pineapple in a bowl to reserve it and dumped the pineapple in with the strawberries and cantaloupe. Then I took pineapple juice and poured some in on the fruit rather than using sugar to keep the fruit fresh!

Secondly, I made up a layered pudding pie! OH this is sooo easy especially if you just grab an already made graham cracker crust from Aldis for 99 cents!
First I mixed up a box of instant Oreo pudding with a can of evaporated milk. Using evaporated milk makes it rich and creamy and not thin and watery! Then I spread about 3/4 of pudding in the bottom of the crust.

Then I mixed up a box of chocolate fudge pudding with a can of evaporated milk and poured about 3/4 of it on to the Oreo pudding in the crust! Oooopss forgot to take the picture before I started the next step!

Then I took an 8oz container of Cool Whip topping and spread that on top of the pudding layers! Then I had an open bag of mini chocolate chips hanging around in the fridge so I sprinkled some on top of the Cool Whip!! Ahhhh a yummy chocolatey no bake summertime treat!! Easy to whip up if you are in a hurry to a cook out or just looking to have some thing for that sweet tooth!

This post is linked at:

Tuesday, June 9, 2009

Peanut Butter Freezer Bars

Right now in the Midwest we are enjoying comfortable temperatures that do not require us to turn on the air conditioning. However, it only lasts as comfortable until you need to turn on the oven to cook or bake. Then in order to bake or cook with the oven you have to turn on the air conditioning just to survive the extra warmth. Instead of turning on the oven to bake treats for my kids, I turn to my selection of no bake delights to keep up with the sweet tooth until the cooler weather/snow arrives back in town.

Here is a recipe for one of those no bake delights that mixes my two favorite things---chocolate and peanut butter! Sorry I don't have a picture of this creation!

Peanut Butter Freezer Bars

1-1/2 cups milk
1/2 cup peanut butter
1 package(4 serving size) instant chocolate pudding
12 graham crackers

  1. Mix milk and peanut butter together in a mixing bowl.
  2. Add pudding to peanut butter/milk mixture. Stir mixture until smooth.
  3. Spread a thick layer of pudding on a graham cracker. Top with another graham cracker.
  4. Put crackers into a covered dish. Place dish in freezer.
Makes 6 bars.

Notes: This recipe is very easy to make a double or triple batch of bars. The last in the freezer for several weeks before the graham crackers start to go soggy. I have used several flavors(oreo, devil's food, chocolate fudge, & vanilla) of instant pudding to make this delight.

Wanting to add some more variety to your no bake dessert selection??

How about trying some of my other no bake desserts:
  1. Banana Pops
  2. Lemonade Ice Cream Sandwiches
  3. Peanut Butter Toffee
  4. No Bake Cheesecake
  5. Layered Pudding Cups
  6. No Bake Cool Whip Pudding Pie
  7. Haystacks
I am always on the look-out for other no-bake easy desserts (something other than ice cream sundaes or popsicles) for the warmer months! What are your favorite, easy, summer time desserts??

This post is linked at:

Monday, May 25, 2009

Strawberries & Cream Dessert

I found a dessert from Betty Crocker to use up some of those cookie mix pouches(other than just making cookies) that I got on sale for 50 cents that I have been in my pantry for a bit!! At the same time, I am able to use an "in season fruit"--strawberries.(look here for more yummy strawberry recipes). I am sure that you could use a homemade sugar cookie recipe to make the crust of this scrumptious dessert. I have used the oatmeal cookie mix and the sugar cookie mix with great results. My personal favorite of the two mixes though is the sugar cookie mix. I might try this dessert with blueberries or raspberries later this summer!


Strawberries & Cream Dessert

Crust:
1 pouch (1 lb 1.5 oz) Betty Crocker sugar cookie mix
1 stick (1/2 cup) butter or margarine, softened
1 egg


Filling:
1 cup white vanilla baking chips (6 oz)
1 package (8 oz) cream cheese, softened


Topping:
4 cups sliced fresh strawberries
1/2 cup sugar
2 tablespoons cornstarch
1/3 cup water
10 to 12 drops red food color, if desired


DIRECTIONS:

Heat oven to 350°F. Spray bottom only of 15x10x1- or 13x9-inch pan with cooking spray. In large bowl, stir cookie mix, butter and egg until soft dough forms. Press evenly in bottom of pan. Bake 15 to 20 minutes or until light golden brown. Cool completely, about 30 minutes.

In small microwavable bowl, microwave baking chips uncovered on High 45 to 60 seconds or until chips are melted and can be stirred smooth. In medium bowl, beat cream cheese with electric mixer on medium speed until smooth. Stir in melted chips until blended. Spread mixture over crust. Refrigerate while making topping.

In small bowl, crush 1 cup of the strawberries. In 2-quart saucepan, mix sugar and cornstarch. Stir in crushed strawberries and 1/3 cup water. Cook over medium heat, stirring constantly, until mixture boils and thickens. Stir in food color(if desired). Cool 10 minutes. Gently stir in remaining 3 cups strawberries. Spoon topping over filling. Refrigerate 1 hour or until set; serve within 4 hours. Store covered in refrigerator.


This post is linked at:
  • Mouthwatering Mondays at From the Land of Monkeys and Princesses!
  • Tasty Tuesday at Balancing Beauty and Bedlam!
  • Tempt My Tummy Tuesday over at Blessed with Grace!
  • I am Blissfully Domestic at Blissfully Domestic!

    **photo courtesy of Betty Crocker because I forgot to take a picture before it was all inhaled!
  • Friday, April 24, 2009

    Summertime Desserts

    Everyone has a sweet tooth that needs to be "filled" on a consistent basis. During the cooler outside temps it is easy to just turn on the oven and heat the house up and bake our favorite chocolate concoctions. :) However, during the summer months turning on the oven makes the house turn into a sauna....so here are some ideas for no bake summer treats!


    Lemonade Ice Cream Sandwiches 

    1-1/2 cups reduced-fat vanilla ice cream, softened

    1-3/4 teaspoons sugar-free lemonade soft drink mix

    2 tablespoons water

    1/2 cup reduced-fat whipped topping

    8 whole graham crackers, halved

    Place the ice cream in a bowl. Dissolve lemonade mix in water; stir into ice cream. Fold in whipped topping. Freeze for 20 minutes or until mixture reaches desired consistency. Spread about 3 tablespoonfuls onto eight graham cracker halves; top with remaining crackers. Wrap individually in foil or plastic wrap. Freeze for at least 1 hour. Yield: 8 servings.

    Nutritional Analysis: 1 ice cream sandwich equals 106 calories, 3 g fat (1 g saturated fat), 3 mg cholesterol, 106 mg sodium, 17 g carbohydrate, trace fiber, 2 g protein. Diabetic Exchanges: 1 starch, 1/2 fat.


    Banana Pops (I found this one at Living On A Dime a while ago, and I don't remember exactly but I think it was in one of their e-books or newsletters that I received.)

    Slice bananas into disks

    Roll banana discs into PLAIN yogurt (you can use vanilla yogurt, but I used plain because that's what the recipe said, and that was back in my super healthy days)

    Add any kind of topping you wish. We rolled our disks in chopped pecans. I know that's expensive, but we love pecans so much. After freezing these we ate them AND YOU WOULDN'T BELIEVE THE TASTE! It was like eating a frozen candy bar. Okay, maybe not that good, but they were sweet and refreshing, and I didn't have to put a limit on how many the kids could eat.

    Other toppings that work well: chopped raisins, granola, any kind of nut (cashew, peanuts, almonds), peanut butter (this would be without the yogurt), and of course, melted chocolate or chocolate chips.

    My son is not a fan of bananas, but he really liked this treat. You can even eat them plain. Oh, yeah, another topping we did was a cinnamon/sugar mixture. Believe it or not, it was good too! I will warn you that it's messy because of the yogurt. And super messy if the kids help! But you don't have the guilt of giving them something unhealthy, and it's a cheap "popsicle."


    Peanut Butter "Toffee"This is a recipe that I concocted using up some things I had in my pantry for a quick treat for my kids!

    I melted some Hershey's chocolate bars. While the bars were melting in the microwave, I take saltines and lined a plate with them and then spread them with peanut butter and then took my melted chocolate and poured it over them and then set them in the freezer til the chocolate was firm. Then I broke them apart and ate! Yummy!

    I am always on the look-out for other no-bake easy desserts for the warmer months! What are your favorite, easy, summer time desserts??

    Other recipes of mine that you can are: